Testing is one of the most important tools in terms of quality software development. In this post i will discuss about the basic concept of testing with a practical example of unit testing.
Topics to be covered in this post-
- Software testing and its necessity
- Unit testing
- Example of unit testing in Eclips

Download Code
Software Testing
Software testing is a process of-
- Finding bugs of a computer software
- Used to identify the correctness, completeness and quality of the software before releasing it to market.
Software testing is very important because-
- For producing a bug/defect free software
- Customer satisfaction
- To ensure the system is reliable and performance is good
- Improving the quality of the software
- To reduce the risk and loss
- Ensuring that all the requirements are met etc.
There are many types of software testing. Among those unit testing is one of the important testing. Because this test helps to detect bugs at early stage of the software development. Before that we have to know what is unit testing.
Unit testing
-Unit testing is the smallest testable part of an application.
-used to test the small modules of the program like functions, class, interfaces etc to test whether those are working correctly.
Lets see an example of unit testing using java so that we can understand it clearly. In java unit testing is done through JUnit. It is a testing framework for java unit testing. I’ll demonstrate the example in Eclips IDE.
Example of JUnit testing
1.Go to File –> New –> Java project

2.Give a name of your project (e.g. unit_testing in my example) and click finish.

3.Our project has been created. Now right click on src. Goto New –> class
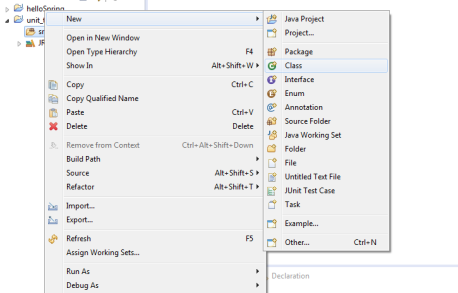
4.Give a name of your class(e.g. Addition in my example) and click finish

5.I’ve write here a simple code of adding two numbers.

6.Now goto File –> New –> JUnit test case

7.Give a name of the test class and click finish.

8.JUnit is not in our build path. We have to add it. Click ok

9.Here I’ve called the add() function from Addition class. Expected variable indicates the expected sum of the integers. assertEquals() is a function that checks if the two objects are equal or not.

10.Now run the program

There is no failure. Because the expected value and output are same.
If I change the expected value and run it then there will be error.

You can test it with all possible values.

I hope this post explained basic concepts of testing. If you still have any queries, please do let me know in the comments section below.
Happy Learning
Download Code
Reference-
